
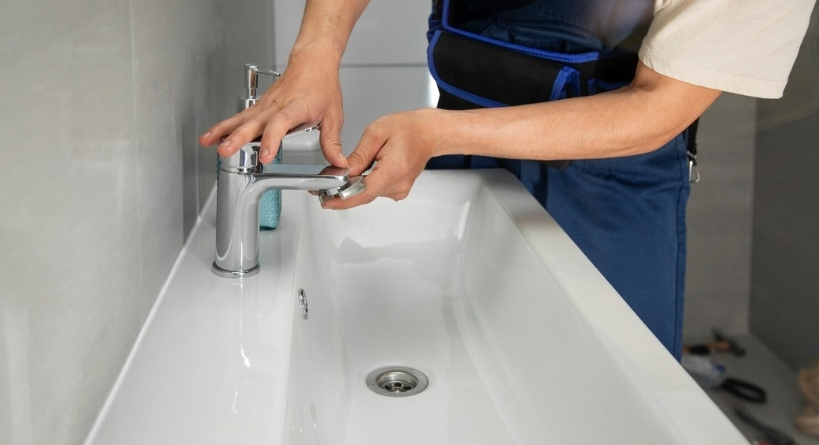
There is a moment almost every homeowner recognises. The tap starts to drip during a quiet night. The sound is soft but impossible to ignore. It feels tiny at first but your brain knows it is wasting water and money with every drop. That is usually the point when a person wonders if a professional is the only way out. The good news is surprising. Fixing a leaking bathroom faucet on your own can be simple, affordable and even a little satisfying.
This guide focuses on clear, practical steps that help you understand the problem before touching anything. A few basic tools, a little patience, and a clear plan are often all a person needs. No chemicals. No complicated gear. No unnecessary spending—just the same straightforward approach trusted by Best Choice Plumber to get the job done right.
First Understanding Why Faucets Leak
A leaking faucet usually comes from a worn internal part. That can be a rubber washer, an O ring, a loose nut or a cartridge that has lost its ability to seal tightly. The faucet structure is straightforward once you see how pieces interact.
Here is a very simple breakdown of where problems usually show up.
Approximate Leak Causes in Most Bathrooms
Pie chart style text representation
- Washers forty
- Cartridges thirty
- O rings twenty
- Loose hardware ten
This simple breakdown already shows why replacing tiny parts can save large repair costs.
Basic Tools You Need At Home
A small repair kit is enough for most leaks. Many people already have the tools, which keeps the entire project extremely cheap.
Tools that help
- A small adjustable wrench
- A flat screwdriver and a Phillips screwdriver
- Plumber tape
- Replacement washers or O rings
- A cloth to protect metal surfaces
Avoiding scratches on the faucet surface keeps the repair looking clean and professional.
Finding The Source Before Spending
Before buying anything, test where the leak actually forms. A careful look saves you from replacing the wrong part.
Signs you can observe next to the faucet
- Drips directly from the spout point to a worn washer or cartridge
- Water pooling at the base points to an O ring problem
- Drips only when the handle moves suggest loose internal hardware
Here is a small visual bar that helps compare the effort level for each fix.
- Effort Comparison Bar
- Washer replacement low
- O ring replacement low
- Cartridge replacement medium
- Loose hardware tightening very low
This simple bar gives you an idea of how quick each option feels for a beginner.
Step By Step Washer Replacement
Washers are the most common cause and also the most affordable fix. A small pack costs very little and lasts for multiple future repairs.
- Turn off the water supply. Valves are usually under the sink.
- Open the faucet to release remaining water.
- Remove the handle with a screwdriver.
- Locate the stem or cartridge housing.
- Remove the old washer from the base.
- Place the new washer and tighten the screw.
- Reassemble the faucet and test the flow.
A single washer often solves the entire problem within ten minutes. The improvement feels instant.
Repairing A Faulty O Ring
O rings seal the area around the base of the faucet. These rubber rings lose shape with regular use and time.
Steps stay simple
- Remove the handle
- Slide off the decorative cap or metal collar
- Locate the O ring around the valve body
- Pull out the worn O ring
- Apply a little plumber grease
- Place the new O ring carefully
This repair costs very little and immediately stops water gathering around the faucet base.
When A Cartridge Needs Replacement
Cartridges control both pressure and temperature. Over time they stop sitting tightly which creates a constant drip.
This part costs slightly more than a washer but still stays budget friendly. The key is getting the correct model from a hardware store. Staff usually identify the correct one instantly if you bring the old cartridge with you.
Steps you follow
- Turn off water supply
- Remove handle and retaining clip
- Pull out the old cartridge with pliers
- Place the new cartridge in the same orientation
- Secure the clip
- Reassemble and test
This fix gives a smooth handle motion and a controlled water flow that feels brand new.
Tightening Internal Hardware
Some leaks begin with nothing more than a loose nut or screw. Metal parts shift slowly across years of use.
A quick tightening often creates a perfect seal again. This step costs nothing which makes it the cheapest repair option out of all.
Small Visual On Cost Comparison
Simple cost bar style text representation
- Tightening hardware almost zero
- Washer replacement very low
- O ring replacement very low
- Cartridge replacement moderate but still budget friendly
- Calling a plumber high cost
This cost bar helps you see how much you save by starting with the simplest fixes first.
Cleaning Mineral Build Up
Many faucets drip because mineral deposits block internal movement. A short cleaning session brings surprising improvement. You only need warm water and white vinegar to loosen build up from small parts.
Steps you can use
- Soak the spout aerator in warm vinegar
- Scrub mineral debris with a toothbrush
- Rinse and reattach
A clean aerator improves water flow and often stops the tiny side drips that appear during high pressure.
Preventing Future Leaks With Minimal Effort
A focus on small habits keeps your faucet healthy for years and helps avoid more repair costs.
Tips that help in the long run
- Avoid forcing the handle when you turn the water off
- Clean the aerator once every few months
- Check the base for moisture during regular cleaning
- Replace tiny parts early instead of waiting for bigger problems
The goal is simple. Small attention today saves larger replacements tomorrow.
Final Thoughts That Bring It All Together
A leaking bathroom faucet looks intimidating for many people at first. After exploring the small inner pieces, it becomes clear that most repairs are easy and extremely affordable. The satisfaction of fixing something at home adds a sense of control and comfort to everyday living. Each small repair also saves water and keeps your bill in check—an approach often encouraged by Best Choice Plumber when the solution is simple and safe to handle.
You do not need advanced skills. You only need curiosity, basic tools, and the right information. Many homeowners who try a faucet repair once never call a plumber for similar issues again. This project helps you learn, helps you save, and helps your home stay calm and efficient, with Best Choice Plumber always available when a professional touch is needed.